Garage Files: How To Install A Suspension Fork
How to install a suspension fork

This year we have seen new and updated suspension forks from some of our sport’s top manufacturers claiming to increase your bike’s off-road performance. If you decided to order one of these new forks for your ride, you’ll have to go through a few steps to get it ready to ride. Here’s our step-by-step guide for installing an out-of-the-box suspension fork.
TOOLS NEEDED:
- Allen wrenches or T-handles
- Flathead screwdriver
- Sharpie pen
- Pipe cutter or saw and vice
- File
- Star nut tool
- Rubber mallet
- Torque wrench
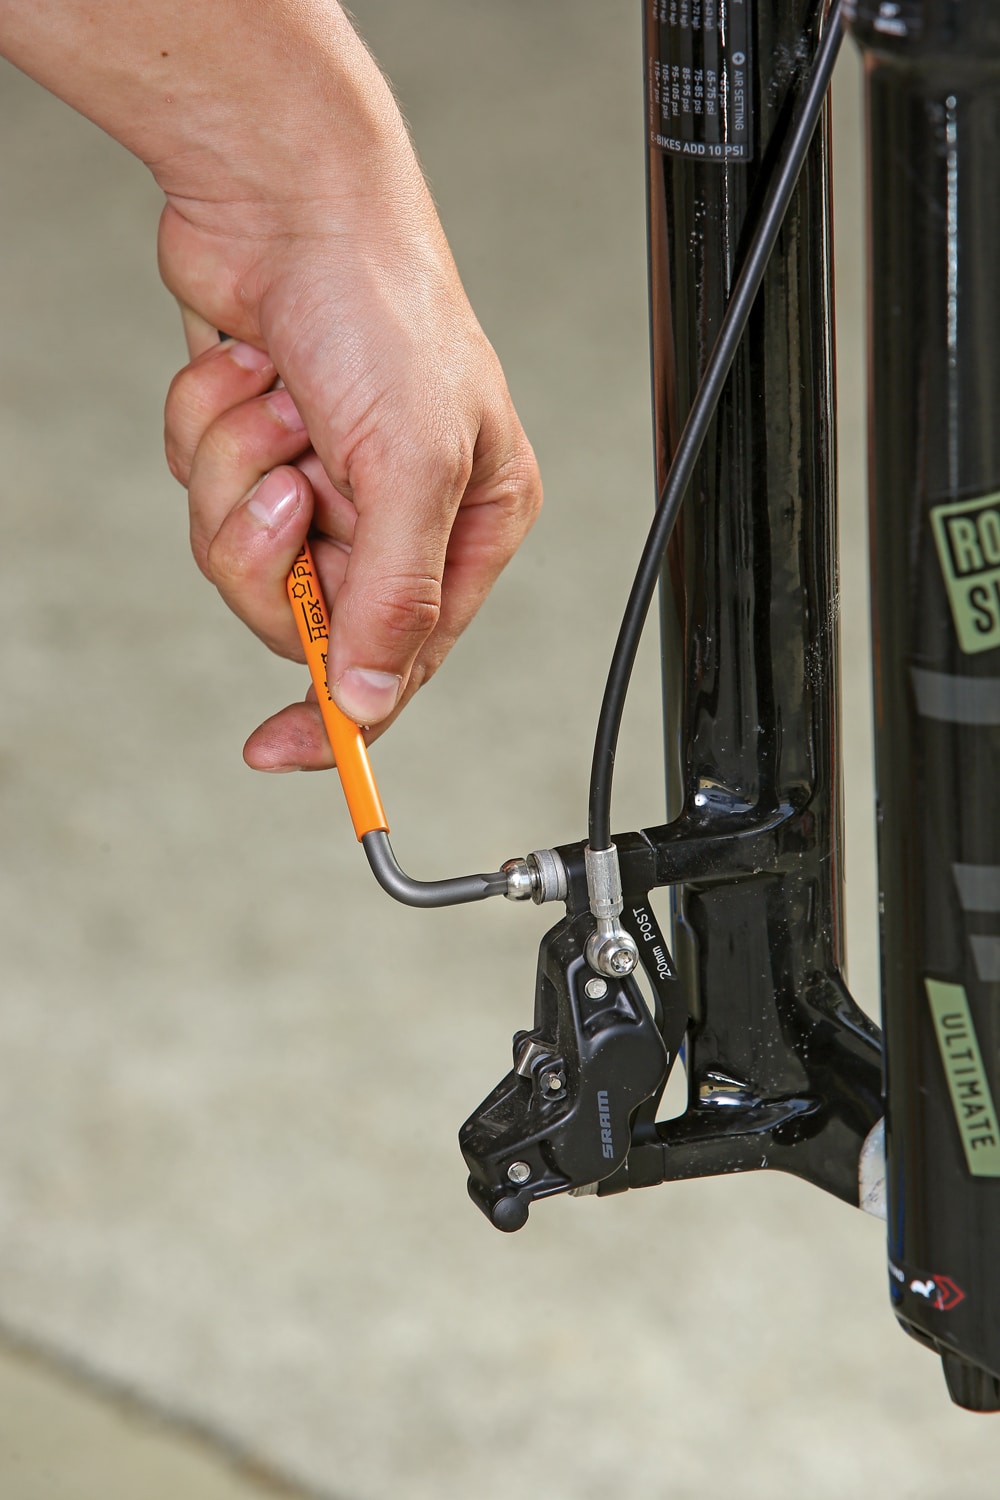
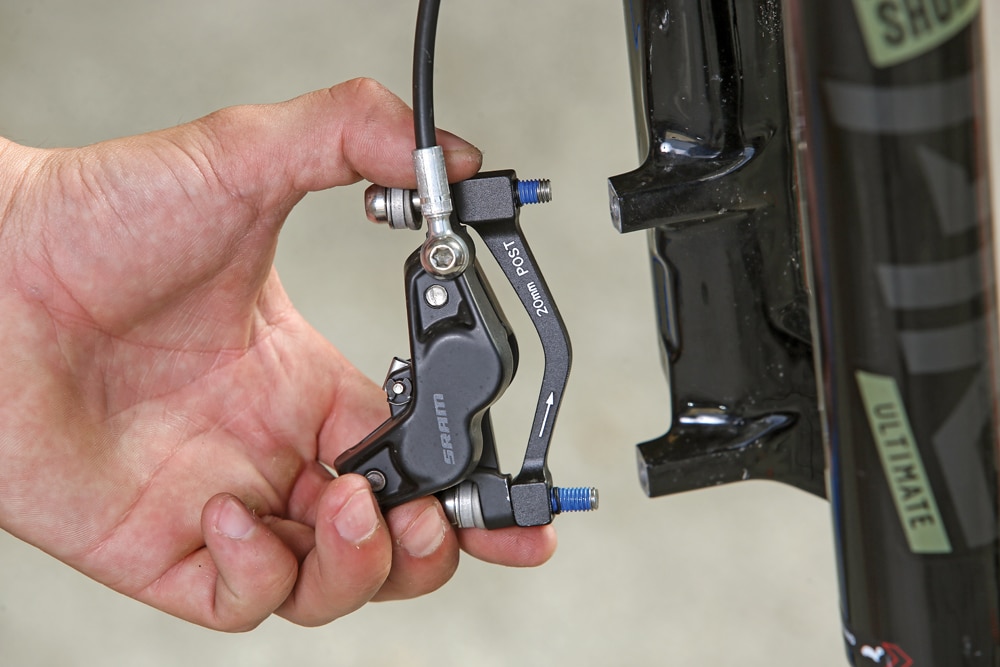 Step 1: Remove your front wheel and then your front brake caliper. Let it dangle while you move on to the next step.
 Step 2: Detach the hose clamp on your fork and reinstall the clamp without the hose to ensure it won’t get lost.
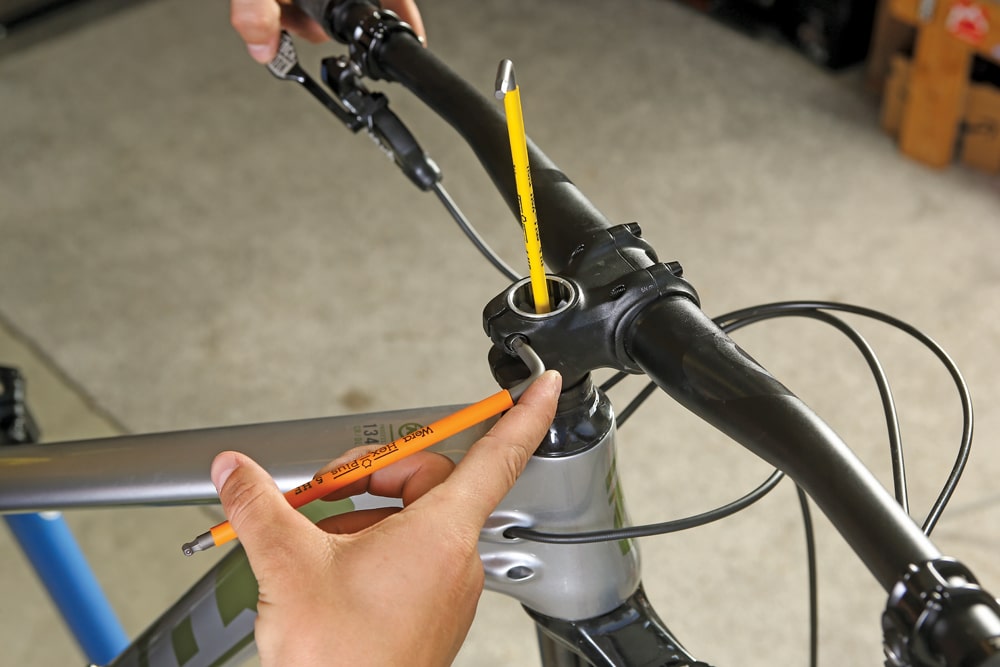
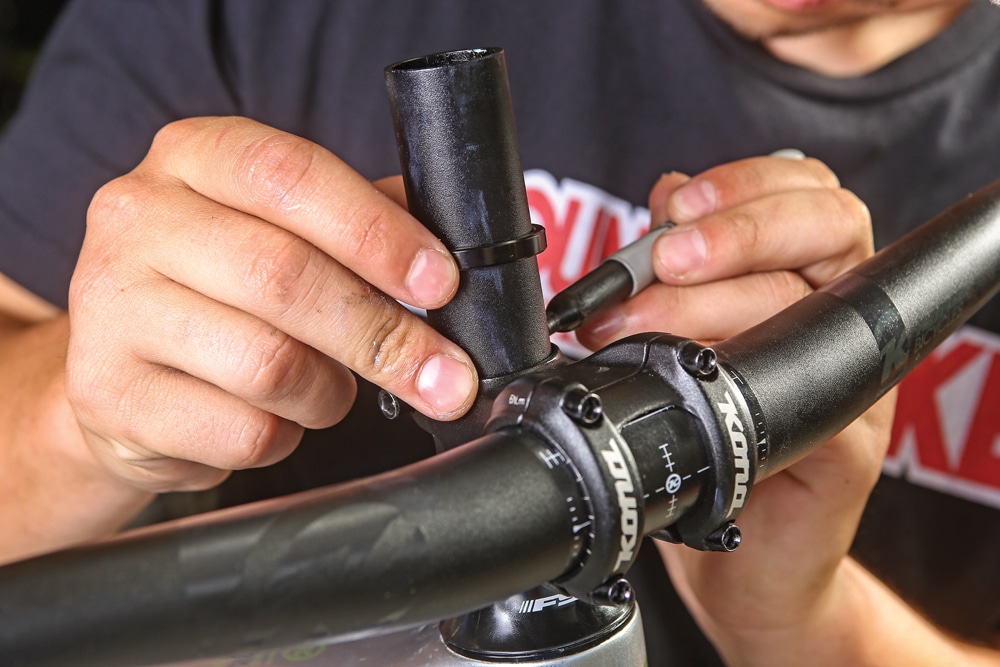
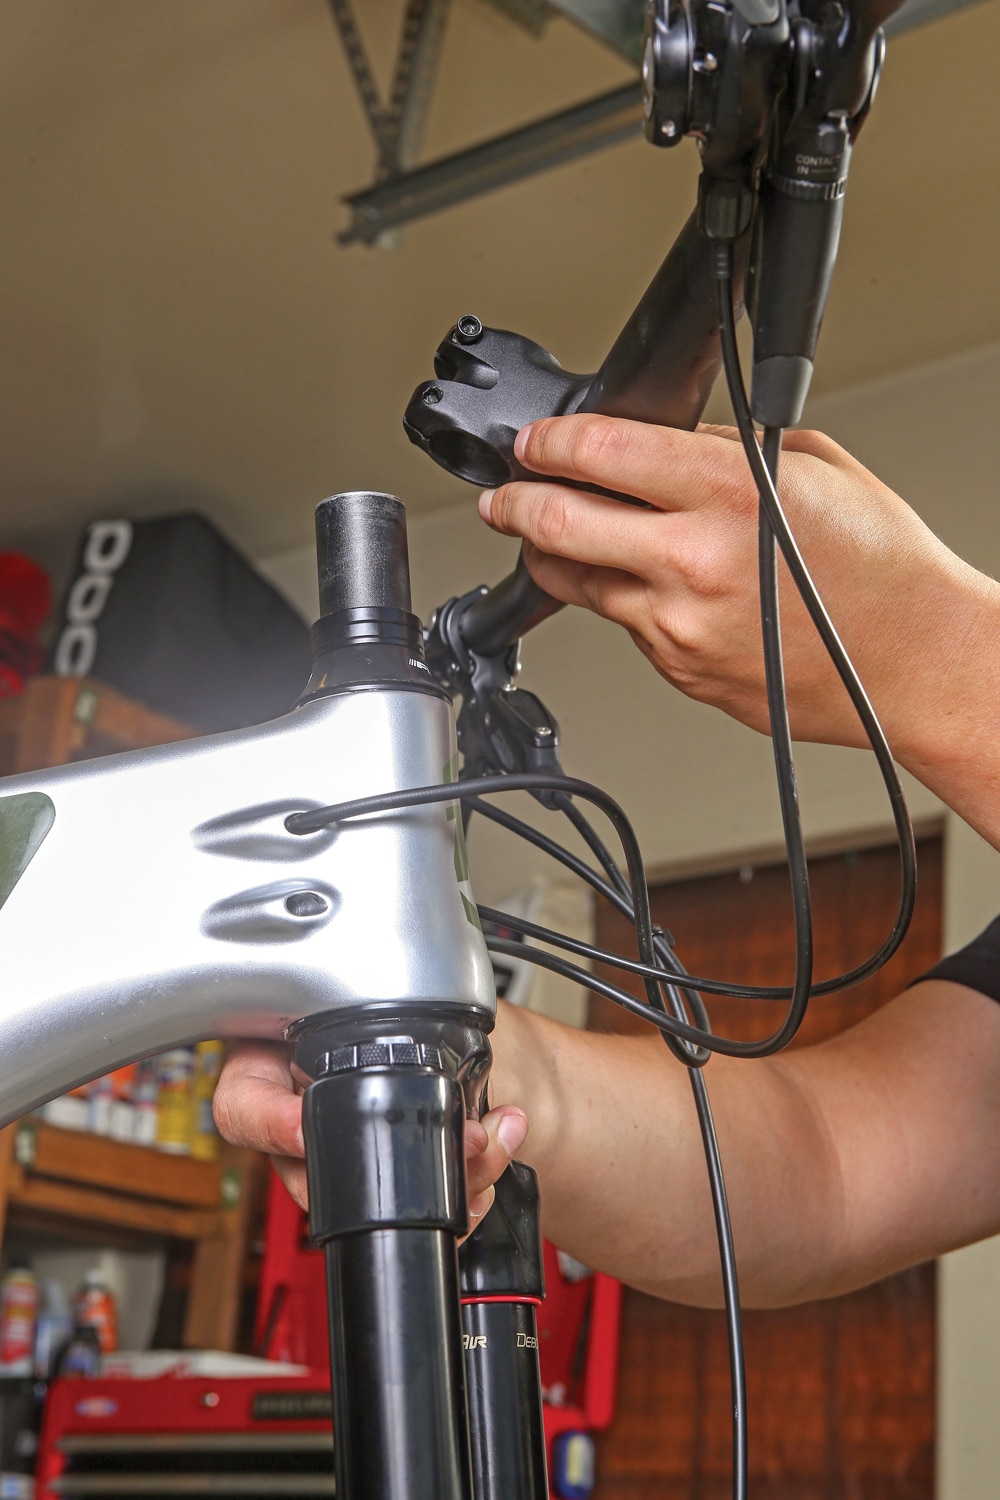
 Step 3: Remove the top cap and slide a T-handle or Allen wrench through the star nut to hold the stem, spacers and handlebars in place. Next, loosen the stem bolts and slide the old fork out.
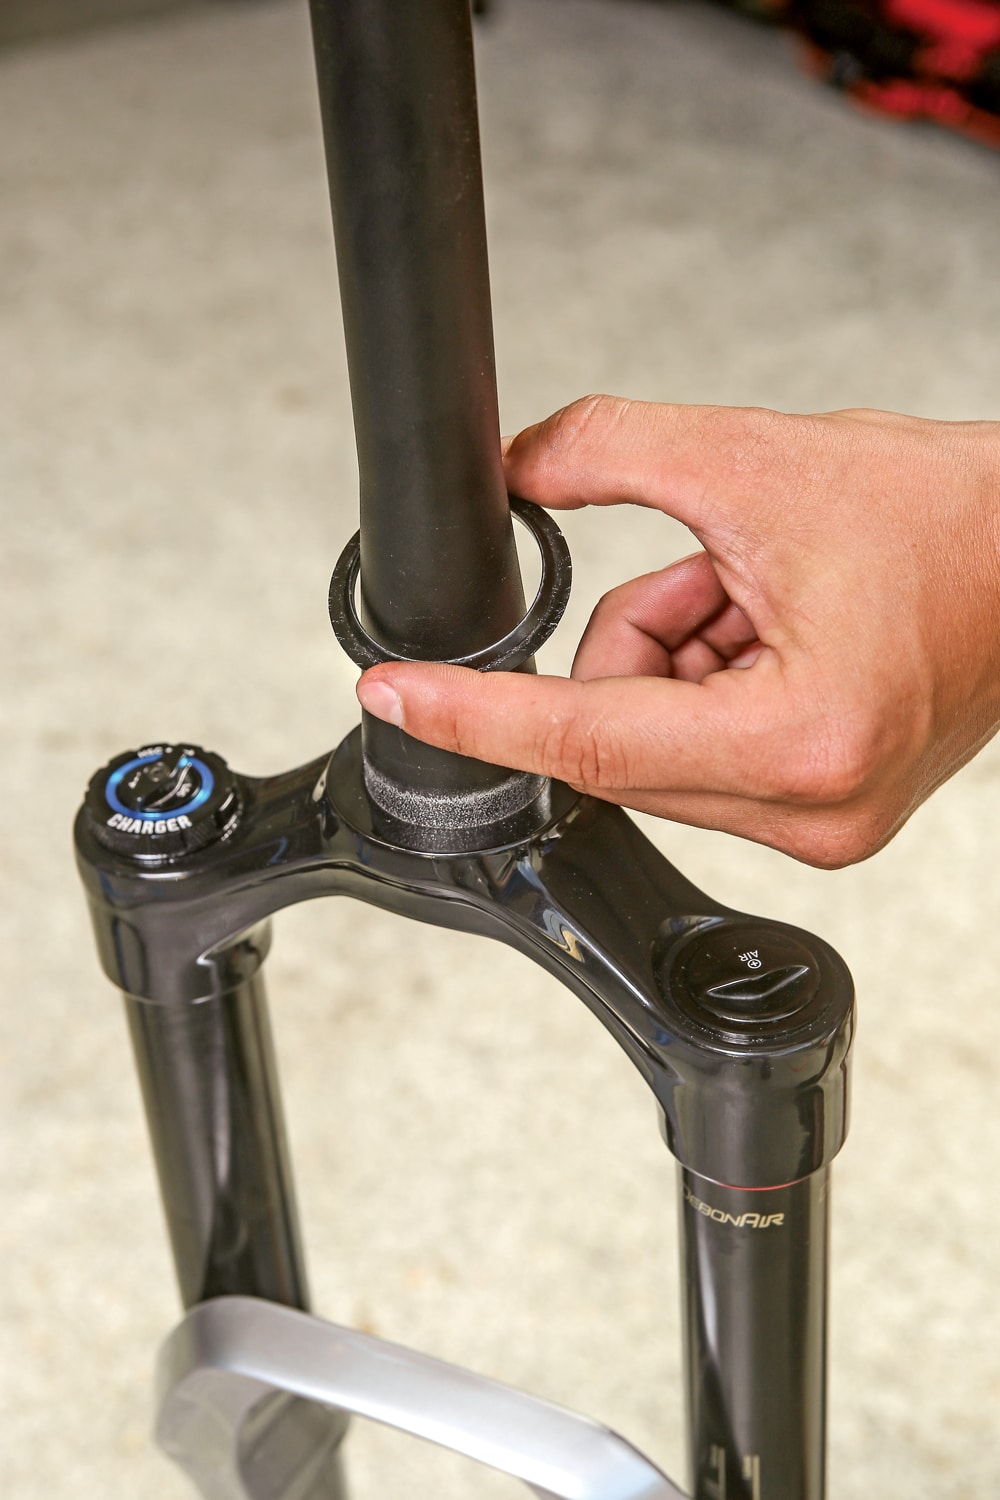 Step 4: The new fork will need a crown race installed before being placed on your bike. This is often a part that needs to be purchased separately. Slide the crown race over the steer tube and use a flathead screwdriver and a rubber mallet to gently tap it in place. Make sure it sits flat and doesn’t have a gap between the crown race and the fork’s upper crown.
 Step 5: Drop the lower headset bearing over the crown race and prepare to…