Refresh

This website mbaction.com/how-to-realign-a-mountain-bikes-bent-derailleur-hanger/ is currently offline. Cloudflare's Always Online™ shows a snapshot of this web page from the Internet Archive's Wayback Machine. To check for the live version, click Refresh.

10 EASY STEPS ON HOW TO REALIGN A MOUNTAIN BIKE’S BENT DERAILLEUR HANGER

Derailleur Hanger Alignment In 10 Easy Steps

Nothing will derail your ride more than rear-derailleur problems. Shifting troubles can be extremely frustrating, mostly because the main source of the problem is often overlooked. When simple adjustments don’t fix your shifting woes, it’s time to check and see if your derailleur hanger is properly aligned. In order for your drivetrain to shift buttery smooth, your hanger must be aligned straight and true.

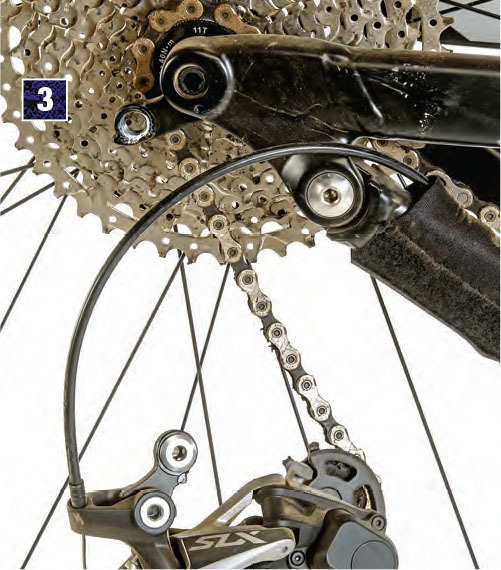
STEP 1: FIRST, CHECK THE BASICS

Before you begin tweaking your derailleur hanger back into position, first make sure that the hanger is actually the source of your shifting problems. Start by checking that your rear derailleur is set up properly, paying close attention to your B-tension screw and ensuring that your cables have proper tension. With modern 1x drivetrains, the upper pulleys on derailleurs don’t have as much axial play, allowing for quicker shifting but requiring more fine-tuning. If those adjustments don’t fix your problem, it’s more than likely you have a bent derailleur hanger.

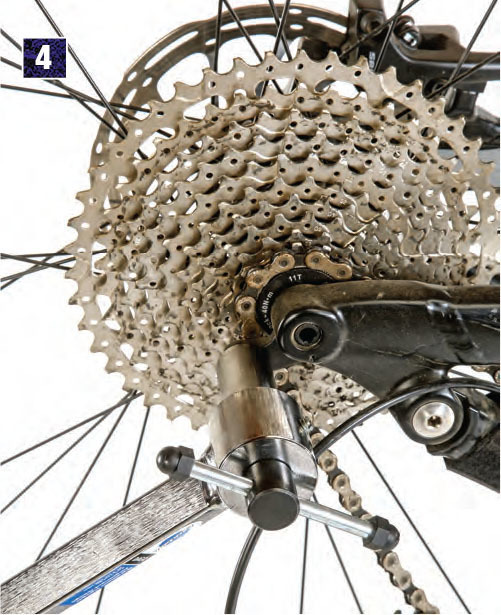
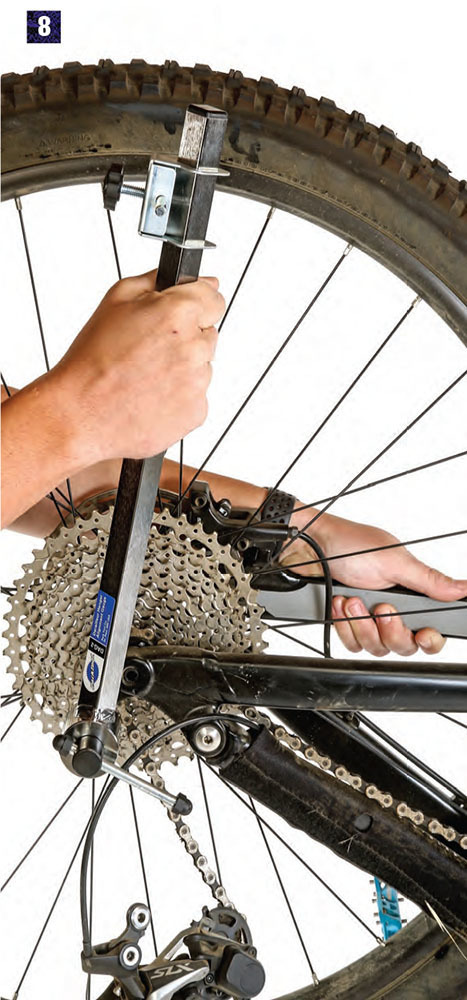
STEP 2: RIGHT TOOL FOR THE JOB

For this repair you will need a Derailleur Hanger Alignment Gauge such as the DAG-2.2 from Park Tool. Any good local bike shop should have a tool similar to this, but if you like to do your own repairs, this tool will cost you $75. Other generic offerings typically cost much less. Given the cost, it might make sense to share this tool among your riding buddies. Whether the damage happened during a crash or a shuttle ride, this is the tool that can fix the
problem.
STEP 3: REMOVING THE DERAILLEURderailleur hanger alignment
The first step when straightening a hanger is to remove the derailleur from the hanger. It can be helpful to take photos with your cellphone to ensure the rear-derailleur is reattached in the correct position. The hanger is designed to be pliable enough to bend during a crash, preventing damage to more expensive parts. It is imperative that the thru-axle is as tight as it is when riding. Never assume that a brand-new bike or brand-new derailleur hanger is perfectly aligned by default. Sometimes the alignment will have been overlooked during the bike’s assembly or damaged during shipment.

STEP 4

Screw the tool’s threaded tip into the rear derailleur hanger’s mounting hole. If you have some grease handy, put a little on the threads. Be sure to not over-tighten the tool, as this will damage the threads.

STEP 5: PLANE JANE

Any plane requires at least three points of reference to be verified. The alignment tool can be adjusted to check three points from its position. This is why the bracket support slides vertically, as well as in and out, to accommodate different wheel sizes and hub spacings.

STEP 7: CHECKING ALIGNMENT

Rotate the tool 180 degrees to see if the indicator is the same distance from the rim as it was before. Note that if your wheel is not perfectly true, you should check the same point of the rim in order to avoid any misreading. To make it easier, you can refer to the valve stem. If the difference between these two readings is less than 3–4mm, you may want to leave your hanger untouched and move on to the next step.
Realigning your derailleur hanger is a delicate operation. Be careful when pulling or pushing on the tool and make sure to use as little force as possible. The goal is to just to get it back to its original form without stressing the material. The more you bend the hanger the more it work hardens the material making it brittle and more likely to break. If you are worried that the hanger’s integrity has been compromised, it’s always best to purchase a new one and save this one for a spare.
Reinstall your rear derailleur, paying attention to its B-tension stop and how it mounts on the hanger. Refer to your cellphone photos from Step 3 if needed. Next, make sure to not over-torque the rear derailleur, as this could misalign the hanger again or strip the threads. Keep in mind that your derailleur’s high- and low-limit screws will likely need to be readjusted as well as the cable tension.
You might also like
edit