THE PROS AND CONS OF GOING TUBELESS ON YOUR MOUNTAIN BIKE

THE PROS AND CONS OF GOING TUBELESS ON YOUR MOUNTAIN BIKE
You may have heard the debate at your local bike shop about converting to tubeless or sticking with inner tubes, and you might be wondering what the benefits of each are. Some riders claim you must run a tubeless setup for optimal performance, while others are happy using inner tubes. So, how do you know if tubeless is right for you?

Tubeless valves become airtight against the rim with the help of a rubber base grommet and a rubber o-ring under the collar.
What is a Tubeless Setup?
This takes us back to 1999 when Mavic, Michelin and Hutchinson got together to design a tubeless system. Essentially, they designed a rim and tire combo that didn’t need an inner tube, similar to a car tire. The early innovators called their system UST, which stands for Universal System Tubeless. The UST design featured a rim channel that was completely sealed and had a raised inner ridge to hold the tire on the rim. Sealant was then used to further reduce air loss. Today’s tubeless rims have spoke holes that require tubeless tape to make them airtight. Tubeless valves and tire sealant are required to complete the system.
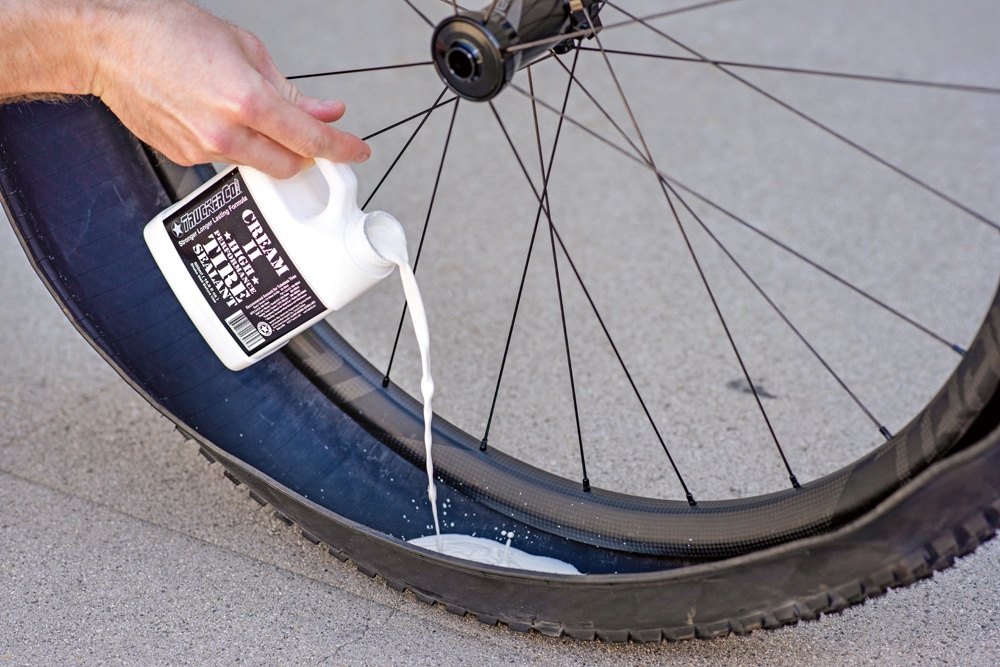 One method of adding sealant is to pour it in before you bead up the tire. We recommend doing this outside to avoid a mess in the shop.
Benefits
• Minimize the risk of flats: Tire sealant plays a crucial role in patching tire punctures as you ride. With tubes, a thorn will give you flats and an impact with a rock or another hard object can drive your rim into your tube, resulting in a “pinch flat” or “snake bite.” To eliminate this scenario, the answer is going tubeless. This also means more time to ride and less money spent on tubes.
• The flow bonus: Although it’s a matter of personal preference, the majority of riders report a much better experience on the trail with a tubeless setup. Part of the reason is that lower air pressures can be used with tubeless systems. Low tire pressures allow the tread to conform more to the trail and provide increased traction while remaining stable. For a rider, this means better climbing performance, smoother riding through trail chatter and less chance of sliding out while cornering.
• Bike diet: Mountain bike inner tubes are typically around 200 grams (a little over 7 ounces). With some tubeless systems, pulling the tubes out of the tires can shave somewhere around half a pound off the weight of the bike. Since this is rotational weight saved at the wheels, a rider will also experience improved acceleration with less energy required to move the bike.
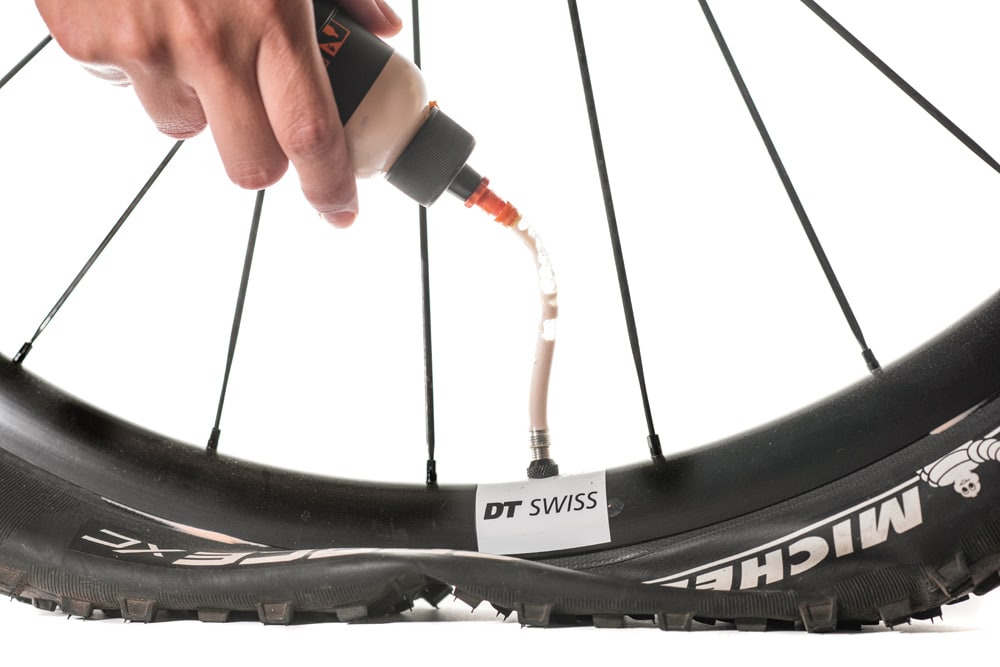 To help from making a mess, there is also the option to inject sealant through the valve with a syringe.
Downsides
• It’s not bulletproof: While your tires may be set up tubeless, a big-enough puncture can render your sealant useless. A hole larger than a 1/4 inch will likely pour your tire sealant all over the trails. For this reason, even when running tubeless you may want to carry a spare tube. Although you might be covered in sealant after installation of the spare tube, you will be glad you brought one to get you home safely. A tire plug is an option for holes too large to seal with tire sealant alone. Essentially, a tire plug is pushed into the puncture on your tubeless tire, and then the tire is re-inflated so the plug can work with the remaining sealant to fill the hole and hold air pressure.
• May hurt the bank account: In comparison to tossing in a new tube and inflating it with a pump, some of the essential items needed to go tubeless have price tags that add up to more than many budget-minded riders will want to spend. Those things include a kit for converting your wheelset, tubeless valves, extra sealant, special trailside tools and tubeless tape.
• Installation and maintenance: Things can get messy and at times be a bit awkward when you first attempt to set up tubeless on your own, but we will give you some tips later. For most, the hardest challenge seems to be getting the bead of the tire to sit properly on the rim. What’s more, over time, the sealant will eventually dry and need to be replaced. Luckily, this is not every single day, but we recommend adding tire sealant at least once every three or four months. Also, if you do gash a big hole in the tire on the trail, tire sealant will probably spray on your clothes, gear, and frame, so there will be some clean-up involved.
 Pushing the limit of a tubeless setup through a rock garden at low tire pressures.
How to Go Tubeless
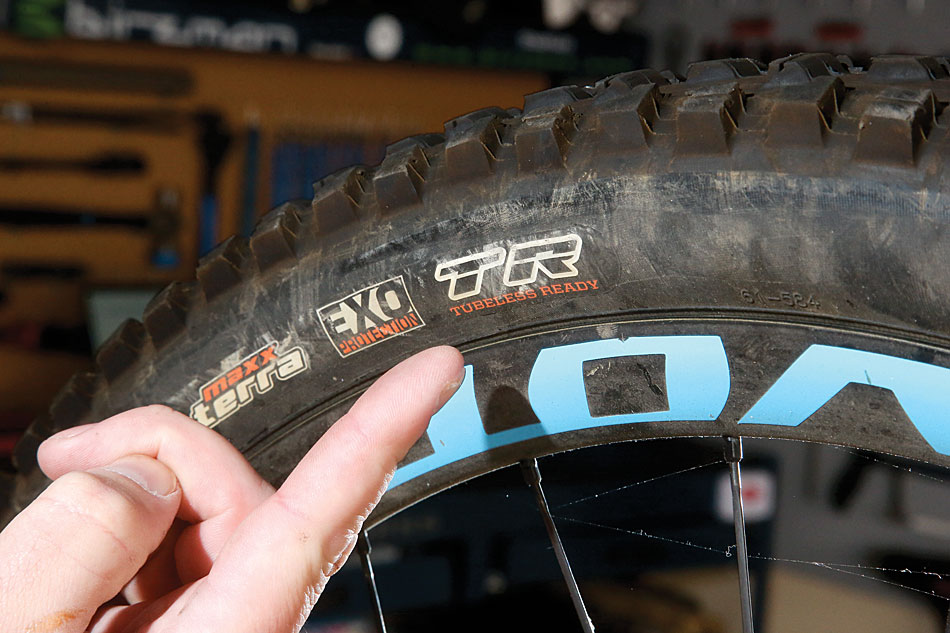
• Method 1: There is a chance your mountain bike came with tubes installed but was advertised as “tubeless-ready.” Check the tire’s sidewalls to see if they are tubeless-ready or not. Rims that are noted as tubeless-ready typically have a tightly sealed rim tape pre-installed. In this instance, the only other items needed are tubeless valves and some sealant. From there, you can do the conversion from the comfort of your garage.
• Method 2: If you wish to turn a non-tubeless wheelset into a tubeless-ready one, you will need some additional items and a great deal of patience. Not only does it take more time to properly install the tape onto the rim, making sure there are no leaks can be time-consuming. Although most tires or rims will work with this method, it is not worth the risks involved when so many proven tubeless systems already exist – it is best to use a tire designated as tubeless-ready to ensure a sealed and reliable system.
Tips on Tubeless
Setting up a tubeless system can cause some headaches if you don’t take the proper steps. To help, we’ve listed a bunch of tips and tricks we’ve learned over the years to keep our bikes rolling right.
• Tire-over-rim advice: Tubeless tires have a very tight fit with the rim in order to keep air securely in the tire. This means that it can be a battle to get the tire over the rim. The first side of the tire is typically not a problem, but the second can have you breaking tire levers or saying some foul words. Once one bead is over, you must take into account where the bead is currently sitting.
The rim’s inner channel is the lowest point, which will give you the most tire to work with on the other side, so it often helps to place the first side of the tire that you mount into the rim channel. Next, be sure the tire bead isn’t caught on the tubeless valve. If it is, push the bead of the tire over the valve to cover it. From there, we recommend starting at the side of the tire opposite the valve and working your way around, pushing the bead over the rim. Of course, you can use tire levers, but be careful not to poke a hole in the tape.
• Tape choice and valve installation are crucial: Tubeless tapes come in a variety of widths to cling to the rim and keep the spoke holes from leaking air. Make sure to figure out the correct tape needed to match the inner rim width of your wheelset. Some riders recommend Gorilla tape; however, tubeless-specific tape is the way to go because of its tackiness and slimmer profile. It’s important to clean the rim completely to help make the installation of the tape easier. Once the tape is properly installed, you must poke a small hole in the tape for the valve to poke through. We typically use an old, sharpened spoke to start the hole and then slowly push the tubeless valve through the tape, being careful not to split the tape.
From here, we take a simple step to maximize the rubber seal on the tubeless valve by butting it up against the rim and tape. To completely set the valve, make sure to tighten the valve collar. It’s important not to over-tighten the collar, since doing so will make it nearly impossible to put in a tube—should you need one later down the road.
• Soap and air compressors rule: Tired of trying to use a floor pump? Tubeless tires need a quick rush of air for the tire to seat onto the rim. Yes, there are tubeless pumps designed to manually pump and compress air into a chamber, but if you have a compressor you can save yourself some time and energy. If needed, you can remove the valve core to allow maximum airflow into the tire. Now, let’s say you got air into the tire but the bead won’t quite seat. What now? To problem solve, we let some air out and then spray or rub soapy water around the bead to help it snap into place once air is added again.

A sliced view to highlight the rim protection and sidewall support of a Cush Core tire insert.
• Inserts and mixing: While tubeless tires don’t get pinch flats, they can sometimes burp out air. That usually happens when a wheel hits a bump sideways, bending the tire to one side and opening a gap between the tire and rim, releasing air. In the best-case scenario, this only lets out a bit of air. At worst, the tire can come off the rim. If the tire does peel off during a downhill run, in an enduro race or on a harsh trail-riding day, it could do some serious damage to you and your wheels. One option is foam-based inserts (such as Cush Core) that are designed to go in a tubeless tire system. The foam inserts do add weight, but they also offer sidewall support with lower tire pressures while protecting the rims.

Should I Run Tubeless?
Tubeless systems seem to get better every year, and there’s no doubt these systems work well. Currently, we think the benefits of running a complete tubeless setup outweigh the cost; however, if you only enjoy an occasional bike ride, a tubeless system might not be worth it. Keep in mind the fact that a tubeless system needs more maintenance than an old-fashioned inner tube. That said, any true mountain bike enthusiast will likely find a tubeless setup is a more-than-worthy upgrade for a modern mountain bike.
Check Out MBA’s Story: How To Go Tubeless
Subscribe Here
Mountain Bike Action is a monthly magazine devoted to all things mountain biking (yes, that’s 12 times a year because we never take a month off of mountain biking). It has been around since 1986 and we’re still having fun.